Cleaning a “Giant”
 How to remove unoriginal varnish and overpaint from a 17th-century oil painting? Step 1: Obtain a graduate degree in art conservation; Step 2: Carefully perform cleaning tests using a range of organic solvents, gel systems, and aqueous methods; Step 3: Choose a system that can be safely administered without causing harm to the underlying original paint layers.
The removal of degraded coatings and discolored overpaint has long been a controversial topic in the history of restoration. Today, conservators have access to a wide range of materials and solvents and are equipped with a substantial background in chemistry. Restorers of the past were limited by what they had access too, which unfortunately included the use of harsh chemicals and concentrated acids and bases (such as lye and ammonia). Modern professionals have access to a wide range of materials and solvents, and conservators are armed with a substantial background in chemistry.
 Concepts such as pH, conductivity, and solubility are always taken into consideration during testing. Problematic pigments and other components can also be sensitive to different cleaning procedures. So PLEASE think twice before grabbing your bottle of Windex® when you are thinking about cleaning a painting!!
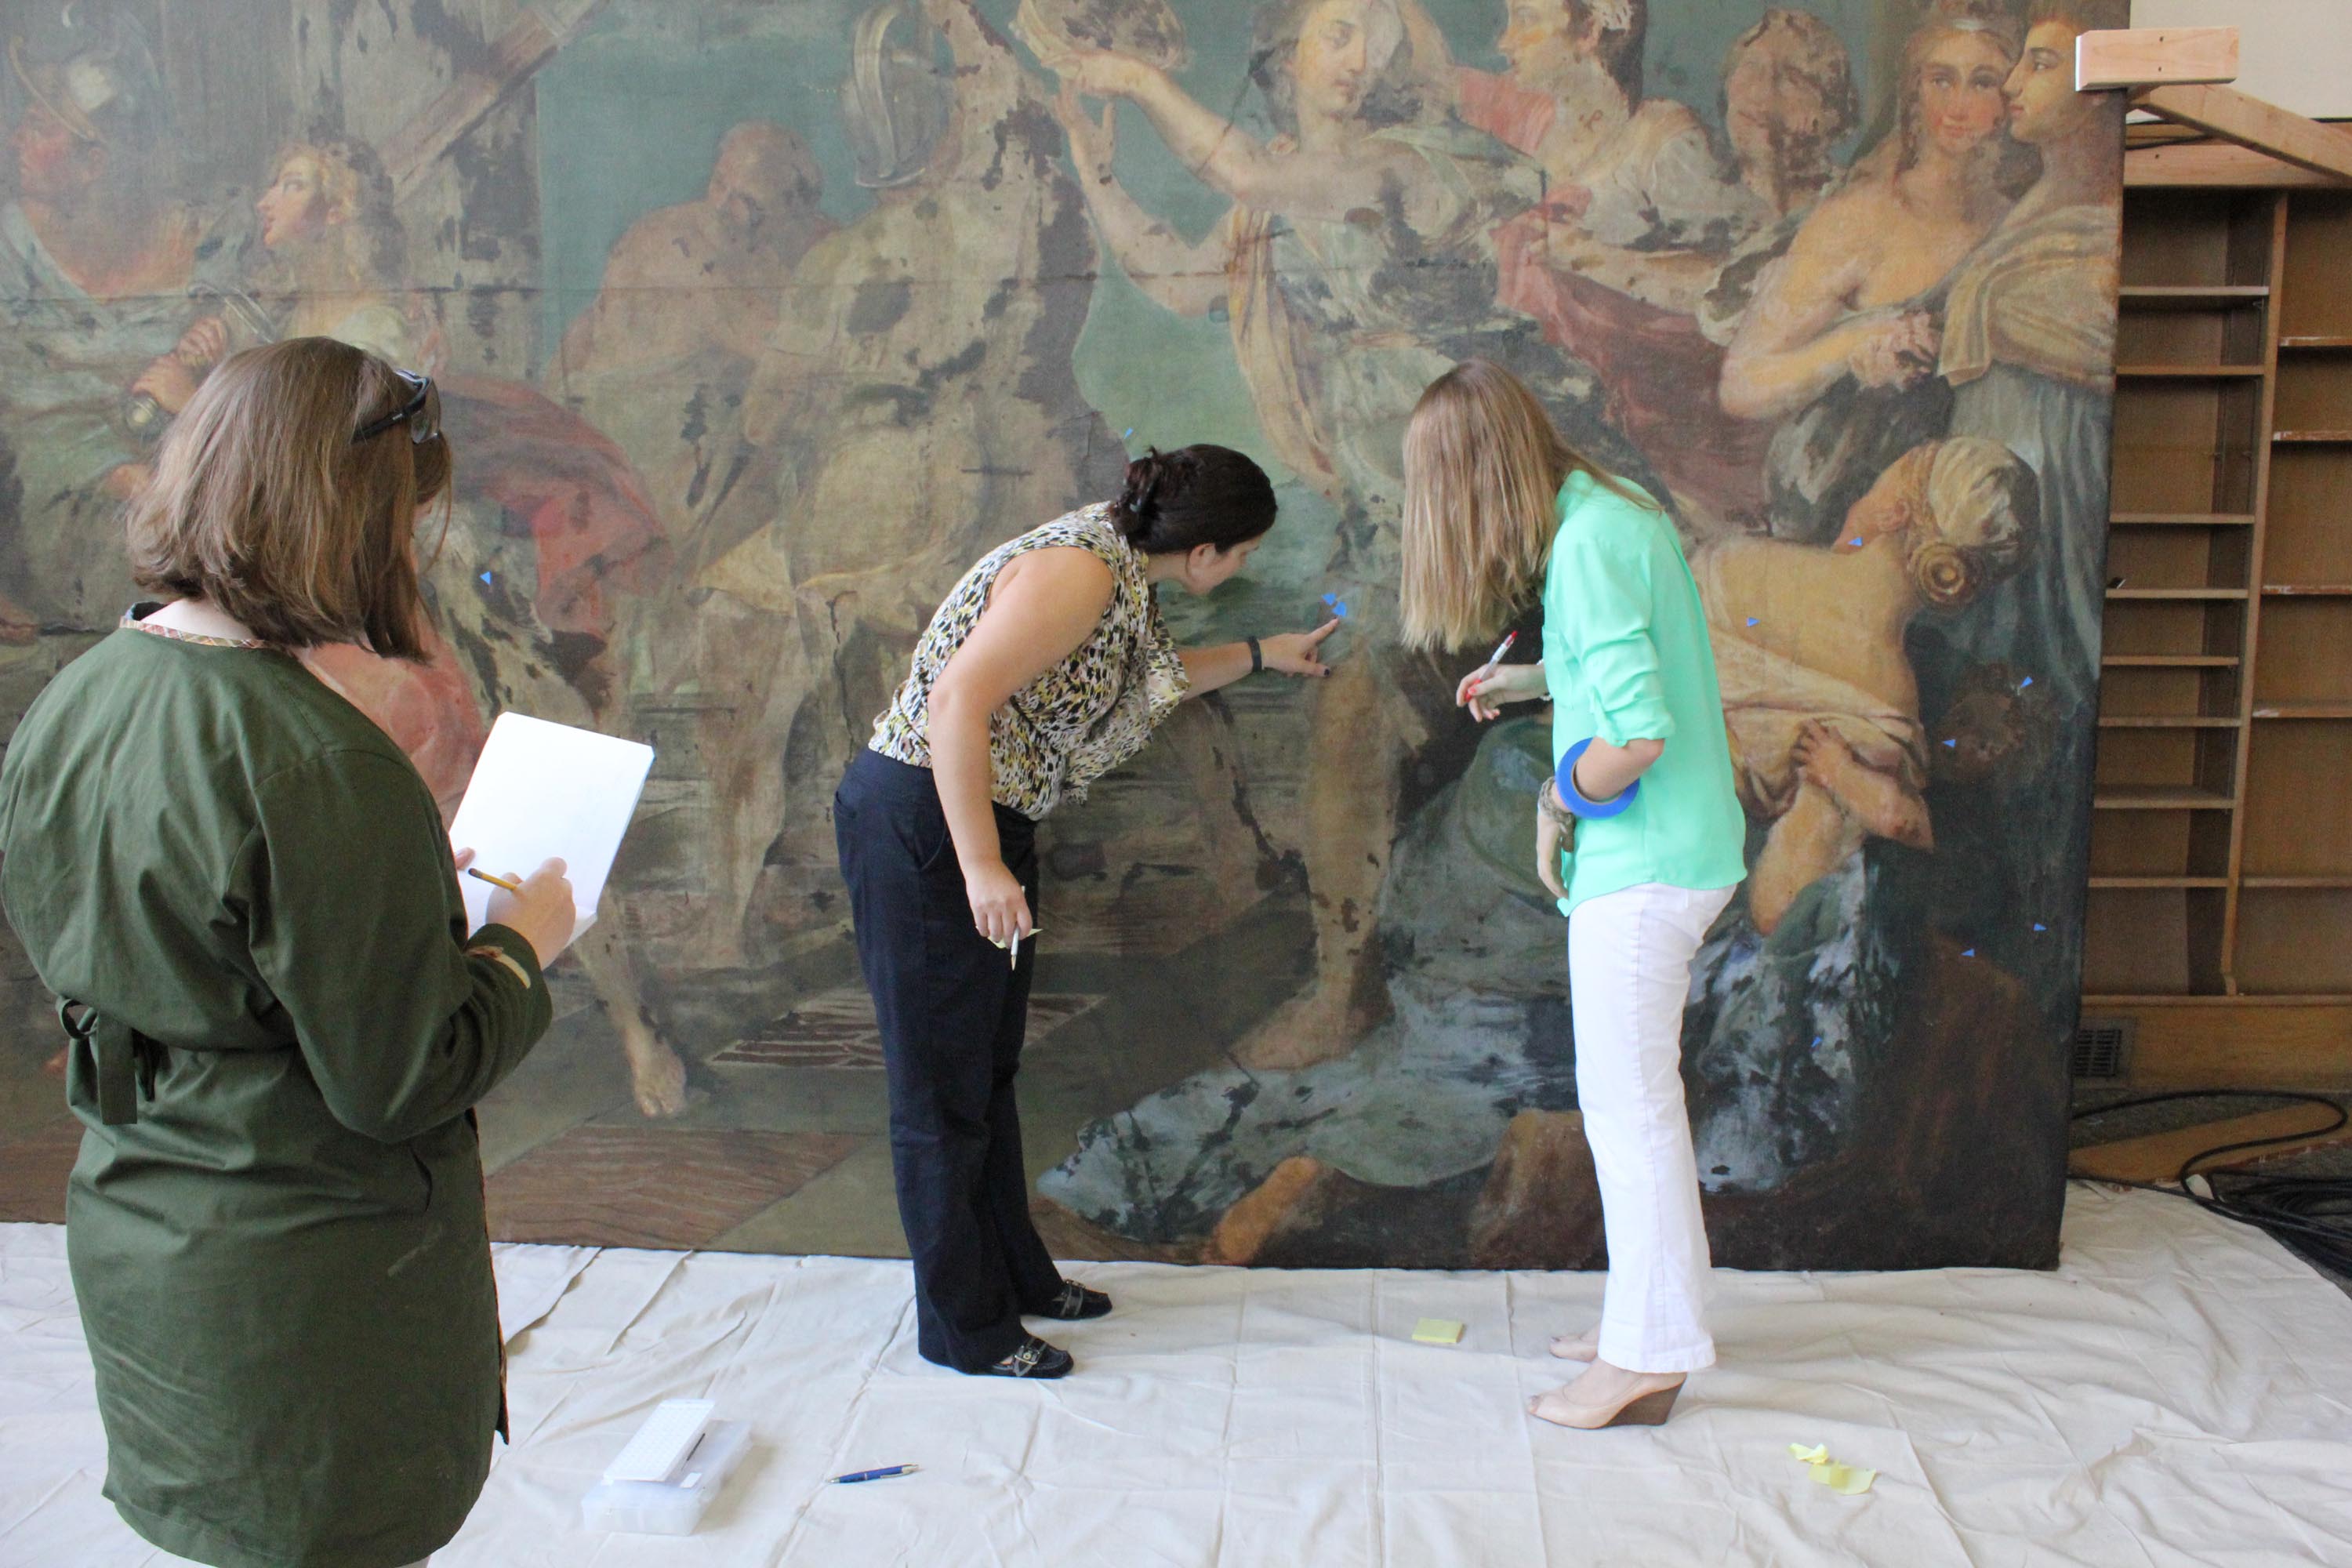
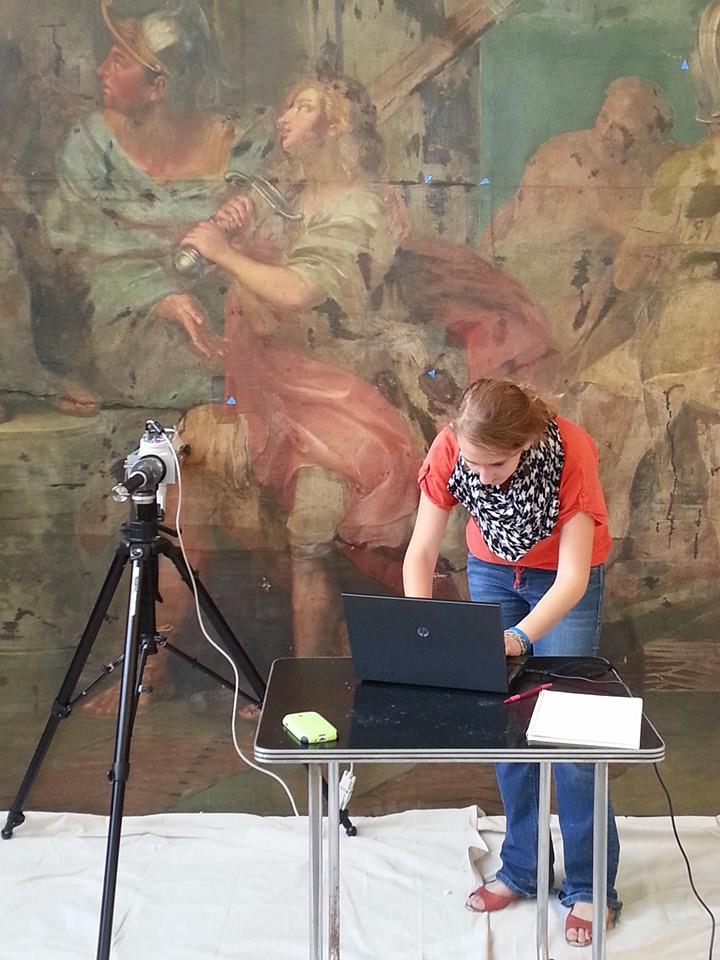
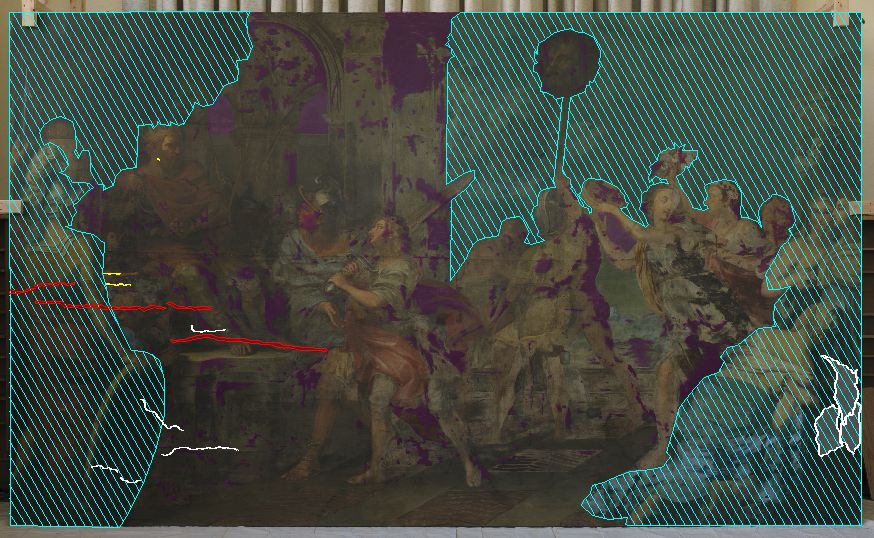
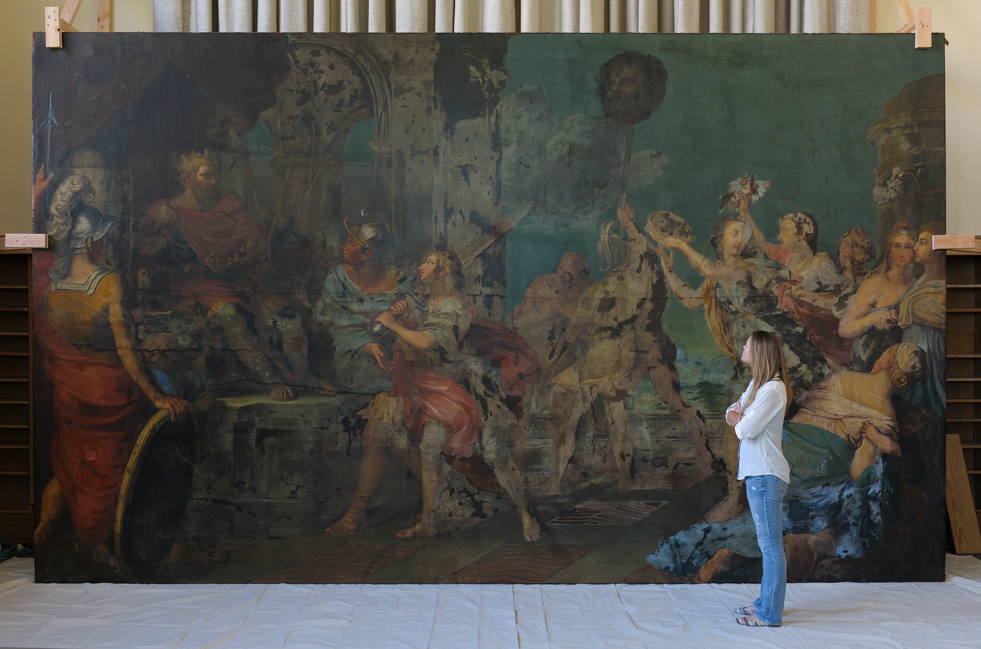
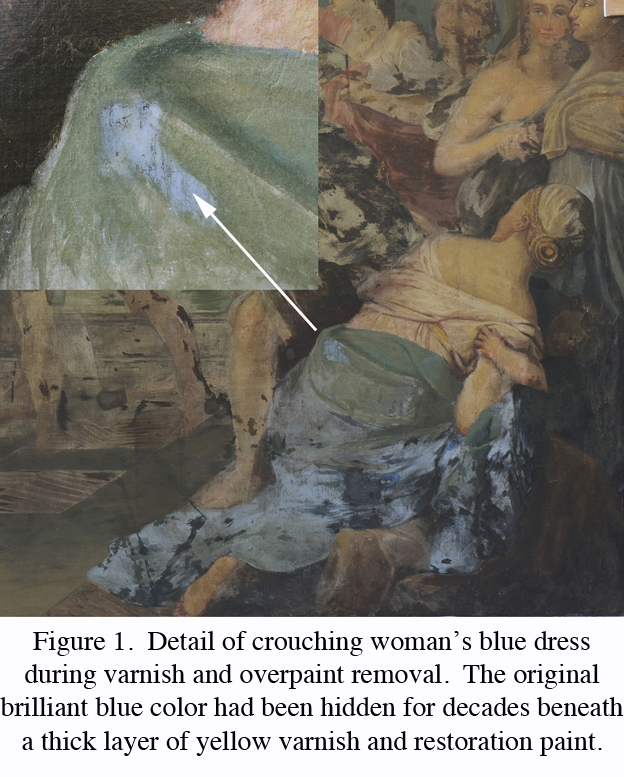
The cleaning process has really involved two major steps, removal of the yellow varnish followed by the removal/reduction of discolored overpaint. Blues, whites, and lighter tones tend to suffer the most dramatically when covered with a thick, yellow veil of varnish as demonstrated in Figure 1. Below the varnish, the conservators also encountered multiple layers of restoration “glazes” that had been hastily applied across the entire surface. Several other figures had been treated in a similar manner during previous restoration campaigns, notably the standing solider on the left side ofthe painting. In Figure 2, it is possible to get a sense of how broadly the overpaint had been applied; in many areas the original drapery pattern and the folds of the cloak were entirely hidden or poorly misinterpreted by past restorers.
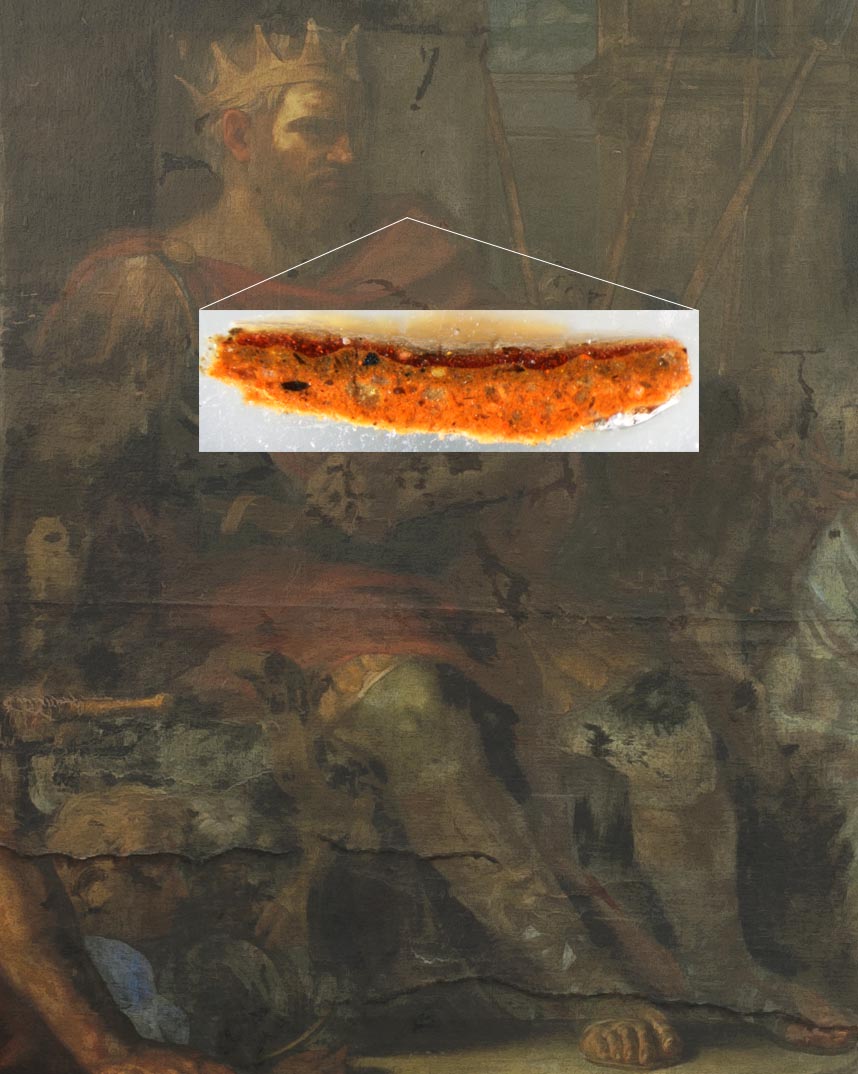
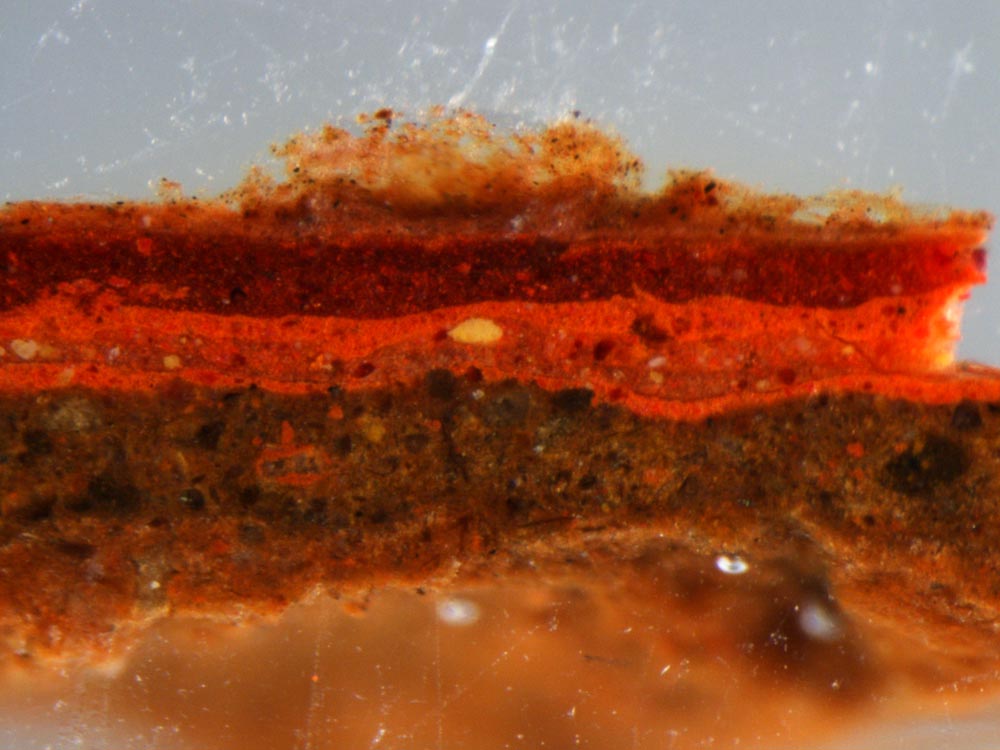
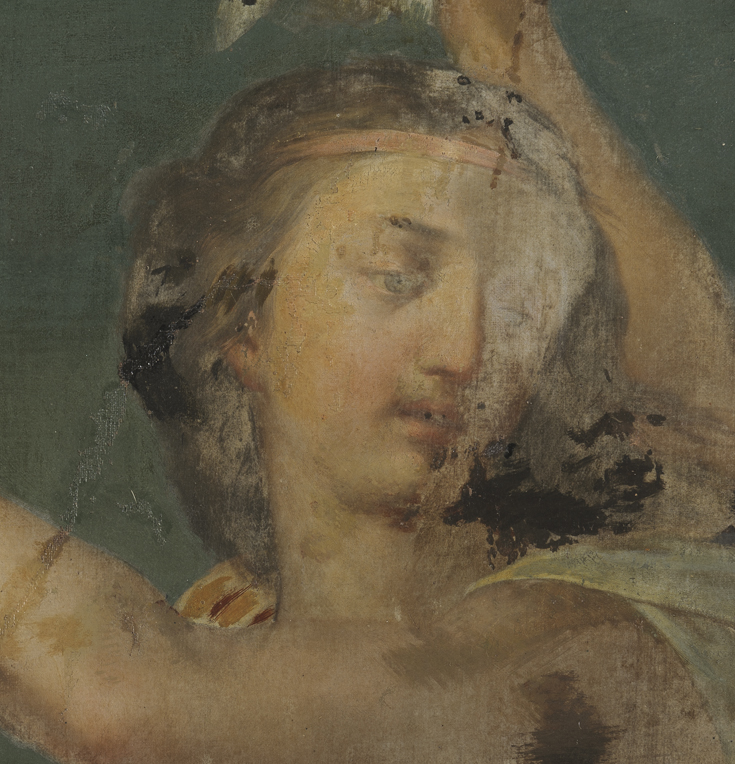
While some areas possessed large amounts of varnish and overpaint, others simply suffered from blanched varnish. “Blanching” occurs when the varnish has become significantly degraded and no longer exists as a continuous film. Microscopic air pockets begin to form within the film and between the varnish and the paint. This makes it difficult to read the paint beneath as the varnish is no longer effectively saturating the surface. Conservators decided to leave small areas of the blanched varnish intact for students, scholars, and visitors to get a sense of how degraded the varnish had become (see Figure 3). By December, the conservation team had been able to successfully clean the bottom half of the painting, moving onto the top half after the New Year.